Unit 8 - Final Project
|
|
We practiced filming with a dolly, one problem we kept having was that the flooring was never smooth so it was a bumpy. One thing that was good, was it made filming walking scenes a lot better. Using a dolly in my final project would be when the player is running the dolly could track the person on the ball. Only reason this wouldn't work is because of the surface and it being grass, which isn't smooth enough for the dolly.
|
|
|
We also practiced with a Dolly on a Track, one problem we had was that the track wasn't that long so it would be a short clip. One good thing is unlike the Dolly by itself it is very steady and smooth. One downside to the Dolly Track is that you can only go in one direction. The track dolly could also be used for the scene where he is running through the players, except this one would be a lot better due to the surface not making a difference because the dolly is on a track.
|
|
|
We also continued to practice with hand held, one problem is that it doesn't always stay up and it very shaky sometimes. One good thing is that you can move in multiple directions unlike the Dolly Track. A hand held shot will be what most of the shots in my final project will be done from. Handheld is a nice easy way to track shots.
|
|
|
We thought of another new angle you could do with the dolly and it was a 360. This angle could be used when a new character appears. Like for example when a superhero comes to save the day. I would use this in my final project when the penalty is about to be taken. A 360 rotation around the player who is about to take the penalty.
|
|
|
The crane shot is good when you want to shoot a tall scene or a more stable shot. The bad thing about the crane is that it can be very slow to turn, so timing is key. You can't go too fast and you don't want to go too slow because then it looks unrealistic. In my final project I could use the crane for when I want a nice steady shot of the person walking over to the scout after he just missed the penalty. This would show the sadness in the character because of how slow the crane moves.
|
|
|
Using a green screen is very useful for when you want to have a scene that you can't get access to. Using green screen and getting it to work is a lot of work and is very difficult to make it look good. Ours didn't look that good because there were a few gaps in the green screen and we had 2 different shades of green. This way was a more harder way to edit the green screen.
|
|
|
The second way makes it look a-lot more smoother and doesn't take as much time. Green screen works a-lot better when you have it in a video and not a still image. I sorted out the gaps in the green screen but adjusting with a few settings. I wouldn't use the green screen in my final project but if I did I would use it to green screen a stadium in that has fans and cheering.
|
|
|
This is my first test shot of my Final Project, this helped me come up with a few more ideas of shots i can. I will now do multiple shots of this dribbling scene in a fast paced way. It also makes more feel more confident in making this video.
|
|
|
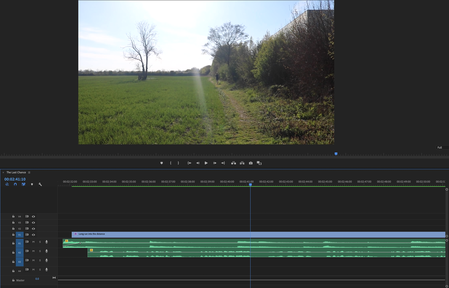
This is the ending part of my final project, i wanted to upload this part because i think this is the best part in the video. I really like the long run down the path and the narrating from the movie Rocky. It feels very wholesome because it portrays the sadness and disappointment the character feels.
|
Screenshots of the edit:
|
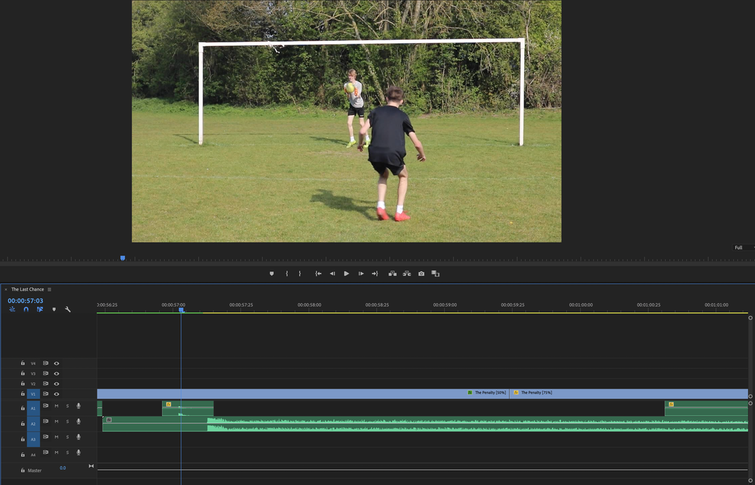
This was the most important part of the edit because everything before this is building up to this moment. I really tried to build tension for this part, so i added heart beats and heavy breathing to emphasise the tension this part adds. I then added a boom like sound after he misses and the player falls to his knees.
|
|
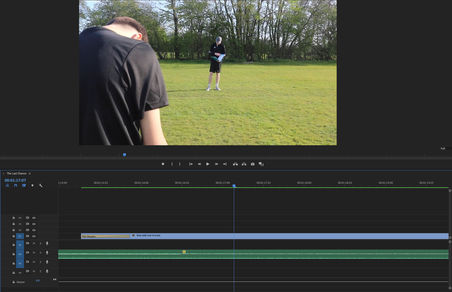
Editing this part was a difficult, this is because trying to link the audio and the footage for when the scout was speaking was a little bit difficult, in the end I made it so you couldn't see the scouts face so you couldn't see his lips moving. In the end this made it better.
|
|
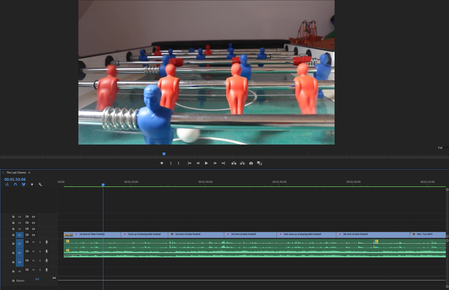
The middle part of the video is a montage like part, the main character playing foosball, before answering a call. I went through a couple of troubles while editing this part because syncing the sound of the foosball wad a little bit difficult and I also had to sync the phone call again.
|
|
This was my favourite to edit because it felt very sentimental, the rocky quote and the Winston Churchill quote was trying to make the film that little bit more emotional.
|
